Thermal · Cold & Heat
Cold plunge vs ice bath: what's the actual difference?
Short answer: none, physiologically. A cold plunge tub and a DIY ice bath deliver the same cold-water immersion. The real difference is convenience and cost. Here is how to choose and how to do it safely.
We earn a commission when you buy through our Amazon links, at no extra cost to you. It never changes a verdict, and we say so when the cheaper product is the better buy. How this works.
There is no physiological difference. A "cold plunge" in a purpose-built tub and an "ice bath" in a filled trash can or bathtub are the same thing to your body: cold-water immersion. What changes is convenience and cost — a dedicated tub is easier, more insulated and repeatable; a DIY ice bath is cheaper to start but more of a hassle each time. This is general information, not medical advice.
The terms get used as if they were rival methods, and they are not. Your muscles cannot tell whether the cold water is held by a $60 inflatable, a $1,000 barrel, or a bathtub full of bagged ice. So the honest way to choose is to ignore the marketing and compare the two on the things that actually differ: how much fuss each takes, what each costs over time, and how easy each makes it to hit the temperature and duration that matter.
Why identical? Because the therapeutic stimulus is the water temperature against your skin and how long you stay in it, full stop. Cold-water immersion triggers the same vasoconstriction, the same drop in tissue temperature, and the same reduction in swelling whether the water sits in a molded tub or a bin from the hardware store. A nicer vessel can make it easier to hit and hold the right temperature — which genuinely matters — but it is not doing anything different to your body.
The terminology, cleared up
"Ice bath" is the old, generic term: you fill a container with cold water, dump in ice, and get in. "Cold plunge" is the newer, product-friendly term that came along with purpose-built tubs — insulated vessels designed for immersion, sometimes with a chiller that cools the water so you never buy ice. Underneath, both deliver identical cold-water immersion. A cold plunge tub is simply a more convenient, more repeatable way to take what used to be called an ice bath.
One more distinction worth making: chiller vs ice. A chiller is a machine that cools and filters the water automatically; an ice-based setup (whether a fancy tub or a trash can) relies on ice you add. Most affordable "cold plunge" tubs — including all of our best cold plunge tub picks— are ice-based. The chiller is the expensive, optional upgrade, not a requirement.
The DIY ice bath, from least to most hassle
If you go the DIY route, the container is really the only decision, and the options trade cost against effort:
- Your bathtub: zero extra cost if you already have one — fill it cold and add ice. The downsides are depth (hard to submerge much of your body), no insulation (the ice melts fast), and tying up the bathroom every session.
- A tote or stock tank: a large plastic storage tote or a livestock stock tank is the classic budget plunge. Cheap, roomy enough to sit in, and it can live outside or in a garage. Still uninsulated, so plan on plenty of ice.
- A chest-freezer conversion: people do turn chest freezers into makeshift chillers, but running mains electricity right next to a tub of water is a genuine hazard unless it is done correctly. We are not going to walk you through wiring power and water together — if that is the route you want, get it done safely, and know that a purpose-built tub is the far simpler answer.
The temperatures and durations that actually matter
This is where you should focus, because it is what determines the effect and the safety — and it is identical whether you call it a plunge or a bath. The Cleveland Clinic's guidance is a sensible frame:
- Temperature: a beginner-safe range is about 50 to 59 degrees Fahrenheit (10 to 15 degrees Celsius). The Cleveland Clinic advises against going below 40 degrees Fahrenheit. Colder is not better; it just raises the risk.
- Duration: keep sessions short. The Cleveland Clinic suggests not exceeding about five minutes, with beginners starting at a minute or two. Recovery-focused research protocols often use 10 to 15 minutes at the warmer end of the range, but you build to that — you do not start there.
- Frequency: a few times a week is plenty. More sessions do not multiply the benefit, and if muscle growth is your goal, timing around training matters (see below).
A cheap thermometer is the most important accessory either way. "As cold as I can stand" is not a temperature, and a DIY ice bath in particular can swing colder than you intend when you overdo the ice.
Water hygiene: where DIY quietly costs you
Nobody thinks about this until the water goes cloudy. Any tub of standing water you sit in picks up skin, sweat and oils, so it has to be changed or treated. A DIY ice bath is usually a fill-and-dump affair — fresh water every time, which is clean but wasteful and a chore. A dedicated plunge tub with a fitted lid keeps debris out and the water usable longer, and a chiller typically adds filtration and sanitation so the same water can last days or weeks. It is a real, recurring difference in effort that never shows up in a spec sheet but heavily shapes whether you keep using the thing. If low maintenance is what keeps a habit alive — and for most people it is — that convenience is worth paying for.
The cost trade-off, honestly
This is the real decision, so let us be concrete about the two paths without inventing a single dollar total:
- DIY ice bath: cheapest to start (a stock tank, a large tote, or your own bathtub). The ongoing cost is ice — and if you plunge often, bagged ice adds up fast, session after session. It is also the most physical effort: hauling ice, filling, draining, cleaning.
- Ice-based cold plunge tub: a modest upfront cost for an insulated, properly shaped tub. It still uses ice, but good insulation and a fitted lid mean a single ice load lasts far longer, so you buy less of it. Electricity cost to run: zero. This is the sweet-spot for most people.
- Chiller-equipped plunge:the highest upfront cost, and the only option with an electricity bill. To estimate that bill, take the chiller's wattage, divide by 1,000, multiply by the hours it actually runs per day (it cycles, so far less than 24), then multiply by your electricity rate — the U.S. residential average is a shade under 19 cents per kWh per the EIA. The payoff is never touching ice again.
Put simply: DIY is cheapest to buy and most annoying to run; an insulated ice tub is the best-value middle; a chiller is the convenience splurge. If you are deciding which tub, our ranked cold plunge tubs already do this math on real products.
If you stay ice-based, a few habits cut the ice bill sharply. Start with the coldest tap water you can — in winter it may already be in range, meaning no ice at all. Keep a fitted, insulated lid on between and during sessions so the cold is not bleeding off into the air. And the more insulated the tub, the longer a single load of ice holds, which is exactly why we weight insulation so heavily in the tub roundup. Small changes here are the difference between a bag of ice a week and several.
So which should you choose?
| If you... | Choose |
|---|---|
| Just want to try cold immersion once or twice | DIY ice bath in a tub or tote you already own |
| Plunge regularly and want it easy and repeatable | An insulated, ice-based cold plunge tub |
| Plunge daily and never want to handle ice | A tub with a chiller (accept the electricity cost) |
| Have almost no space | An upright barrel — less water, same immersion |
Safety, the part that is the same for both
The cold does not care what container it is in, so the safety rules are identical. Never plunge alone if you are new to it or going very cold. Get out if you feel lightheaded, unusually numb, or any discomfort beyond the sensation of cold. Do not go below 40 degrees Fahrenheit, and do not stay in chasing a longer time — the risks of very cold water (cold shock, impaired coordination) rise faster than any benefit. People with heart conditions, high blood pressure, or who are pregnant should talk to a clinician before starting; this article is general information, not medical advice.
One training note that carries over from the recovery side: if building muscle is your current goal, do not cold plunge in the hours right after lifting, because cold-water immersion can blunt the muscle-size response to resistance training. Our sauna vs cold plunge guide covers that timing rule and where heat fits in.
The two formats also have completely different hygiene profiles — fresh water every time against water that lives in the tub — which we go through in how to clean a cold plunge.
Same cart
Essentials under $40
The cheap stuff that decides whether the expensive thing gets used. These are add-ons, not ranked picks — no rubric, no score, and nothing here changes a verdict above.
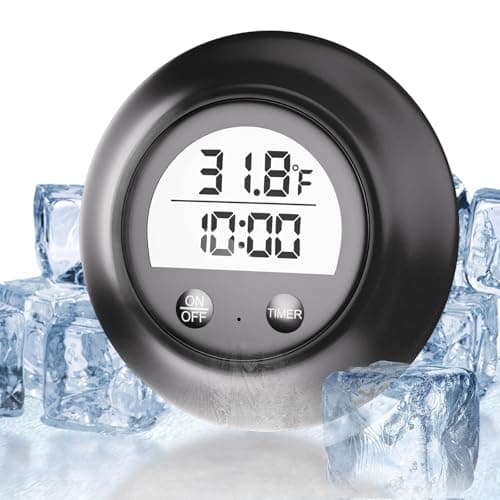
Ice Bath Thermometer with Timer
"As cold as I can stand" is not a temperature. The guidance on this site is 50-59°F for two to five minutes, and neither number means anything without a thermometer and a clock — this floats in the tub and carries both.
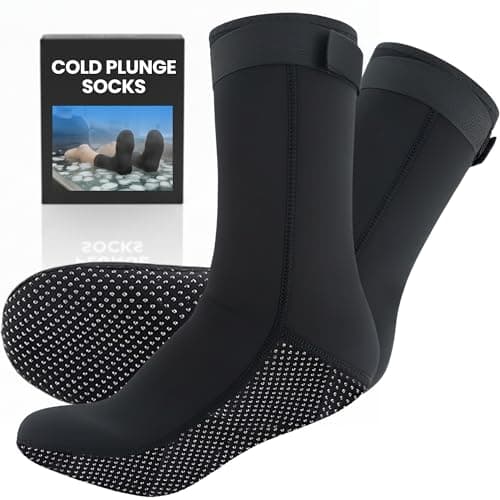
3mm Neoprene Cold Plunge Booties
Feet hit the pain ceiling long before the rest of you does, which is why most people climb out early. 3mm neoprene buys back the last minute or two of a session. Sold by size — pick yours on the listing.
#ad · Live prices from the Amazon Product API, as of October 19, 2026. Where fit or size varies by tub, body or machine we link a search instead of guessing, and where we have no verified price we show none. We may earn a commission.
How we picked
We did not lab-test this gear
Everyone in this category says they tested twenty products. We have not lab-tested any of these, and we say so. What we did instead: compiled the published specifications, pulled the numbers from the manufacturer manuals, ran the cost-to-run and cost-per-unit math where there was math to run, and scored each product against a published rubric. The scores are judgments from documented research — not measurements we took, because we do not have a lab and we will not pretend we do. Where a number came from someone else's work, we name them in Sources.
Questions
Frequently asked
Is a cold plunge the same as an ice bath?
Is a cold plunge tub worth it over a DIY ice bath?
How much ice do you need for an ice bath?
How cold and how long for an ice bath?
Does a cold plunge need electricity?
Keep reading
Related
- Best cold plunge chillersWhat a chiller costs to buy and to run.
- Best cold plunge tubsRanked ice-based tubs with the capacity, insulation and cost math done.
- Sauna vs cold plungeWhat cold does for recovery, the hypertrophy caveat, and when heat wins.
- Best sauna blanketsThe heat half of the hub, for contrast therapy at home.
- Compression boots vs ice bathThe other recovery tool competing for the same 20 minutes.
Receipts
Sources
- Cleveland Clinic — What to know about cold plunges (temperature, duration, safety)
- Frontiers in Physiology 2025 — cold-water immersion dose (duration and temperature) network meta-analysis
- Piñero et al., 2024 — cold-water immersion and resistance-training hypertrophy (timing caveat)
- U.S. Energy Information Administration — average residential electricity price
We do not run a testing lab, and we do not pretend to. Where a measured number came from someone else's work, we name them and link them. Where we could not verify something, we say so on the page rather than quietly leaving it out. Read our full method.